

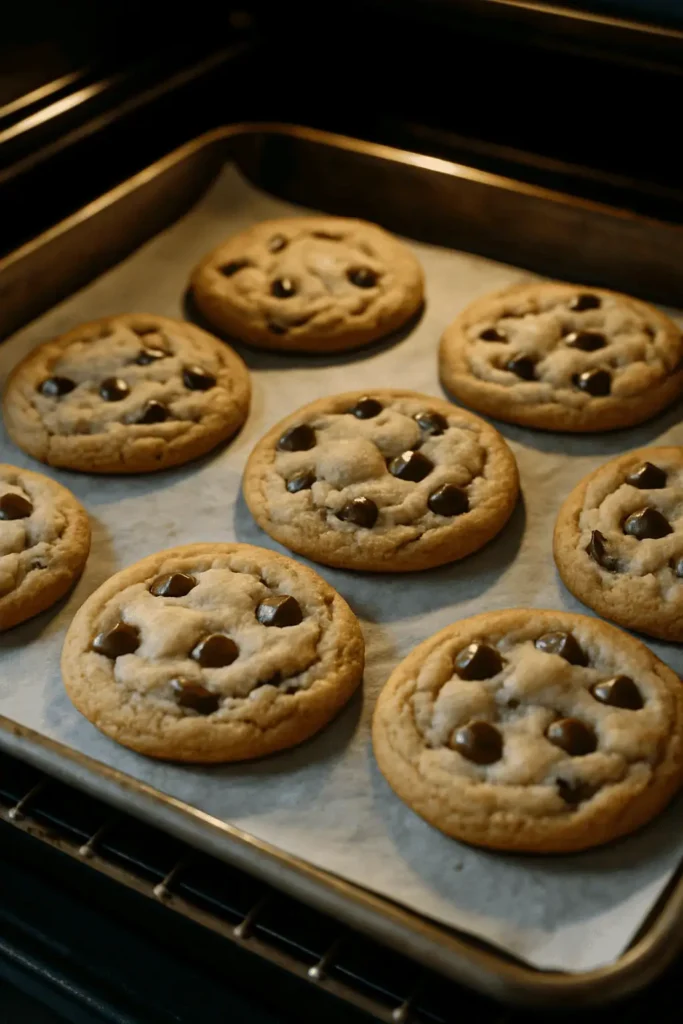
There’s nothing worse than opening your oven door, excited for perfect chocolate chip cookies, only to find a tray of sad, flat discs that look nothing like the chunky, bakery-style cookies you were dreaming about. Trust me, I’ve been there – more times than I care to admit!
I started baking cookies seriously about ten years ago, and my early attempts were… questionable at best. My first batch of “homemade” chocolate chip cookies spread so thin they basically turned into one giant, burnt cookie pancake covering the entire baking sheet. My roommate still brings this up at parties. Thanks, Jen. 😑
After years of trial and error (and so many flat cookie disasters), I’ve finally cracked the code on why cookies sometimes fall flat. The science behind cookie structure is actually pretty fascinating, and once you understand what’s happening, you’ll never have to suffer through disappointing cookies again.
The Science Behind Perfect Cookie Structure
Before we dive into all the ways cookies can go wrong, let’s talk about what makes cookies go RIGHT. What exactly are we looking for in a perfect cookie?
For most American-style drop cookies (like chocolate chip cookies), we’re aiming for:
- A tender center that’s slightly underbaked
- Crisp edges that provide texture contrast
- Some height and thickness
- A good spread that isn’t too much or too little
Getting this perfect balance is ALL about chemistry. Yep, you’re basically a scientist when your baking cookies! The interactions between fats, sugars, proteins, and leavening agents create the final texture and shape.
I remember in high school chemistry thinking “when will I ever use this?” Well, turns out, EVERY TIME I BAKE COOKIES. Who knew?!
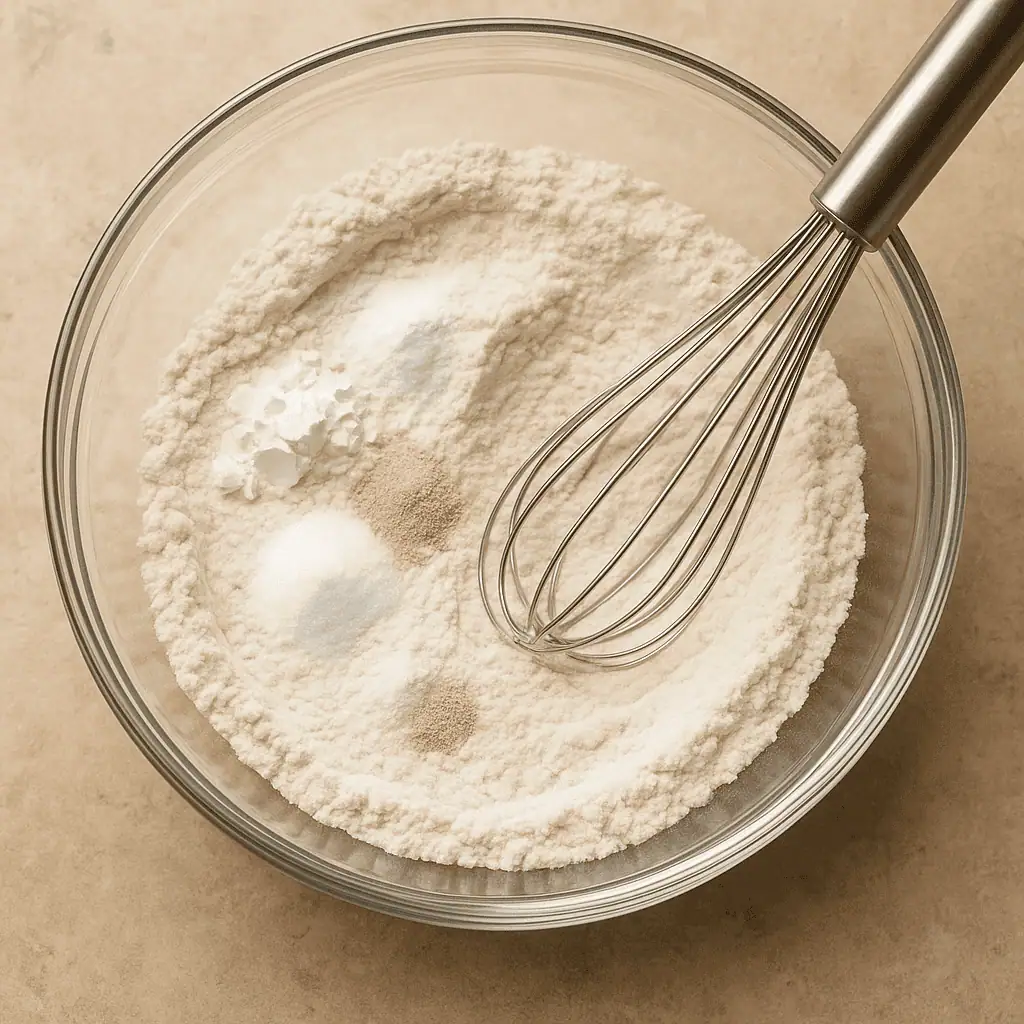
The Basic Cookie Chemistry
- Fats (butter, shortening, oil): Provide tenderness, flavor, and affect spread
- Sugars: Affect sweetness (duh), but also texture, moisture retention, and spread
- Flour: Provides structure through gluten development
- Eggs: Add moisture, structure, and richness
- Leavening agents (baking soda/powder): Create rise through gas bubbles
- Mix-ins (chocolate chips, nuts, etc.): Add texture and can affect spread by “anchoring” the dough
These ingredients don’t just hang out together—they interact in specific ways during mixing and baking. When you change the amount, temperature, or type of any ingredient, you change the final result.
The Top 7 Reasons Your Cookies Are Flat
Let’s get to the heart of the issue—why do cookies sometimes spread into flat puddles instead of staying thick and chewy? Here are the most common culprits I’ve encountered through years of cookie failures.
1. Your Butter is Too Warm
This is prob the #1 reason for flat cookies, and I’ve been guilty of this SO many times. When I’m impatient (which is often), I’ll try to speed up the butter-softening process by putting it in the microwave or near a warm oven. Big mistake.
When butter is too warm or melted, it can’t hold air bubbles effectively during creaming. Also, warm butter spreads faster in the oven before the cookie’s structure has time to set.
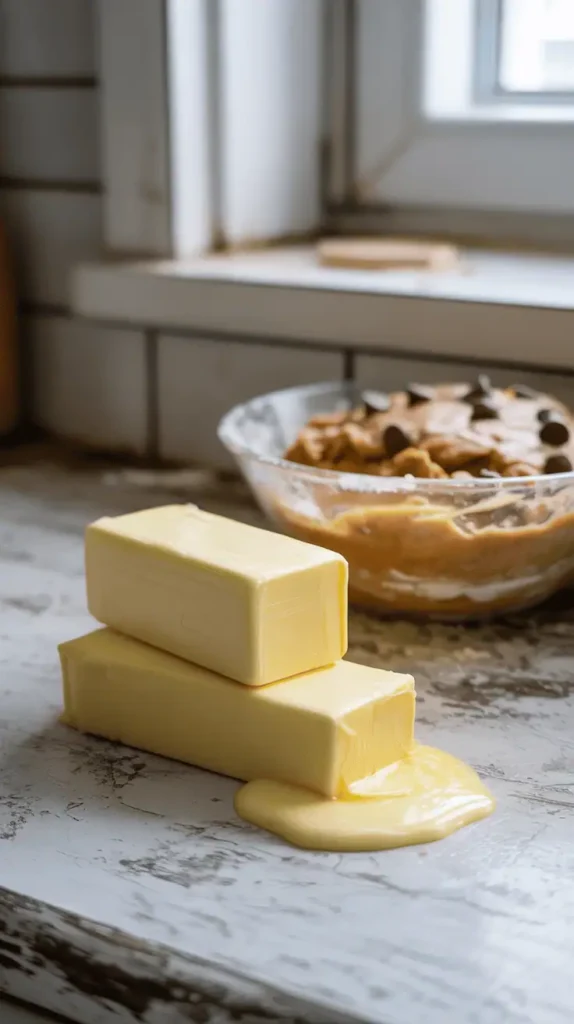
The Fix: Butter should be cool room temperature—meaning it should give slightly when pressed but still hold its shape. If you can easily poke your finger all the way through, its too soft! I like to leave my butter out for about 30-45 minutes before baking, depending on the room temperature. If you’re in a hurry, try grating cold butter with a cheese grater for faster softening without melting.
My baking breakthrough moment came when I started treating butter temperature as a non-negotiable. No more “ehh, close enough” when it comes to butter consistency. This one change took my cookies from flat discs to perfect bakery-style beauties!
2. You’re Using the Wrong Sugar Ratio
Different sugars affect cookies in different ways:
- White granulated sugar creates crispier, thinner cookies that spread more
- Brown sugar (which contains molasses) creates thicker, chewier, moister cookies that spread less
If your recipe has way more white sugar than brown, you’re gonna get flatter cookies. This is just science!
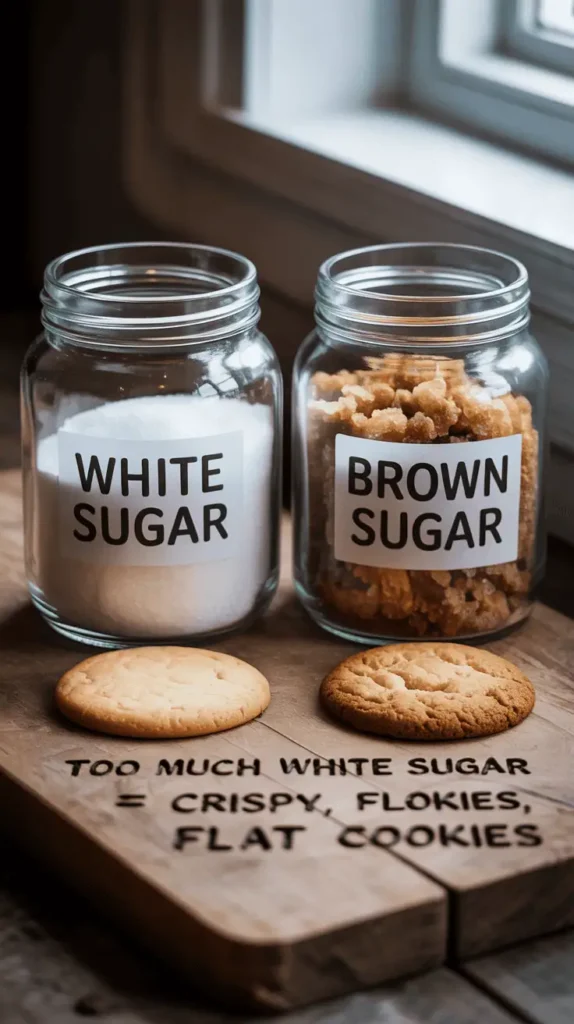
The Fix: For thicker cookies, use more brown sugar than white sugar. Many of my fave recipes use a 2:1 ratio of brown to white sugar.
I once brought cookies to a work potluck and was kinda jealous of my coworker Alicia’s perfect, thick cookies. When I asked for her recipe, it turned out we were using THE EXACT SAME RECIPE, except she’d accidentally used all brown sugar instead of the mix the recipe called for. That happy accident led to thicker, chewier cookies!
Not sure how to measure ingredients correctly? 👉 Grab this free Baking Conversion Cheat Sheet to convert grams, cups, ounces, and more!
3. Your Leavening Agents Are Old or Unbalanced
Baking soda and baking powder don’t last forever, people! If your leavening agents are expired or have lost their potency, your cookies won’t rise properly.
Also, these two ingredients work differently:
- Baking soda needs acid to activate (like brown sugar, buttermilk, or cream of tartar)
- Baking powder already contains acid and will activate with moisture and heat
Using the wrong one, or having them lose there potency, can result in flat cookies.
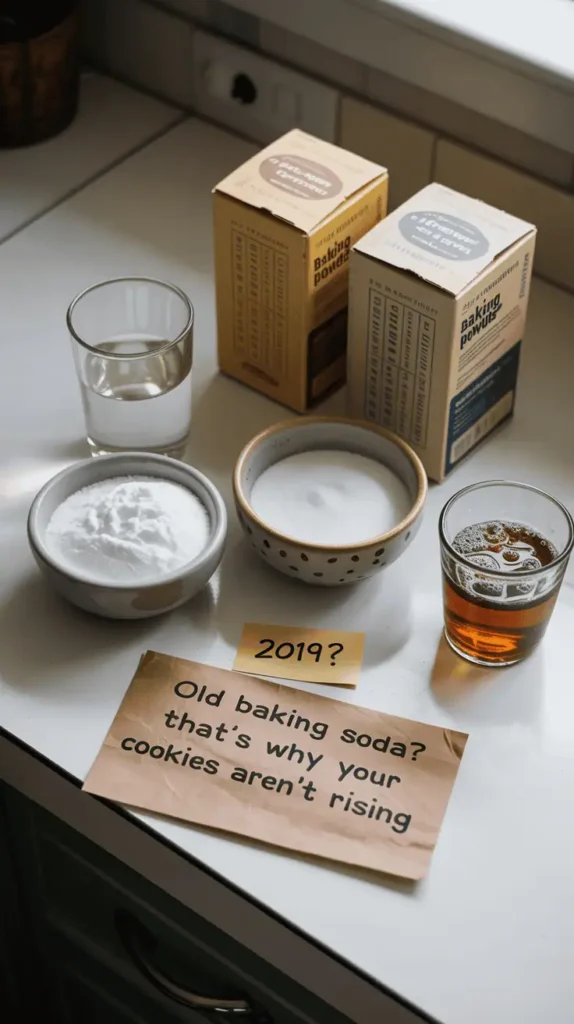
The Fix: Replace your baking soda and powder every 6 months. To test if they’re still good:
- For baking powder: Put a teaspoon in hot water. It should bubble vigorously.
- For baking soda: Mix with a bit of vinegar. It should fizz immediately.
Last Christmas I made FOUR BATCHES of failed cookies before I realized my baking soda was from 2019. 🤦♀️ I was so mad at myself—all that butter and chocolate wasted because I couldn’t be bothered to check the date on the box!
4. Your Not Chilling Your Dough
This ties back to the butter temperature issue. Even if you start with perfectly room-temperature butter, the friction from mixing will warm it up. Plus, giving the flour time to hydrate helps control spread.

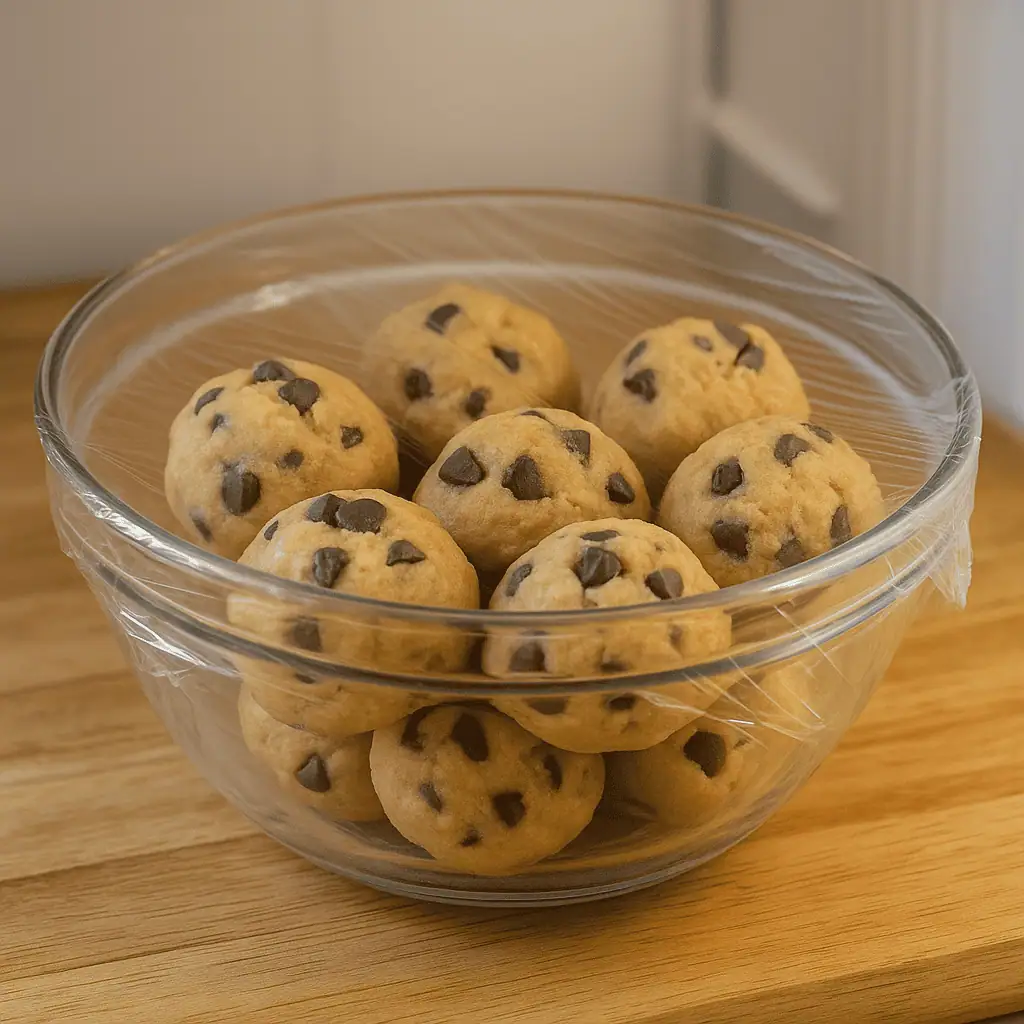
The Fix: Chill your cookie dough for at least 30 minutes, but preferably 24 hours (I know, the patience required is PAINFUL). This firms up the butter again and allows the dough to fully hydrate, resulting in better texture and less spread.
Sometimes I’ll make cookie dough before bed, chill it overnight, and bake the cookies fresh in the morning. There’s something deeply satisfying about waking up knowing that cookie dough is waiting for you. It’s like a gift from past-you to future-you!
5. Your Ovens Too Hot or Too Cold
Oven temperature is CRUCIAL for proper cookie structure. If the oven is too hot, the edges of the cookie set while the middle is still raw, causing the center to rise up and then collapse as it cools.
Every oven has its quirks — track yours with this fun Oven Personality Tracker and stop guessing temperatures for good.
If its too cool, the cookies spread too much before they start to set.
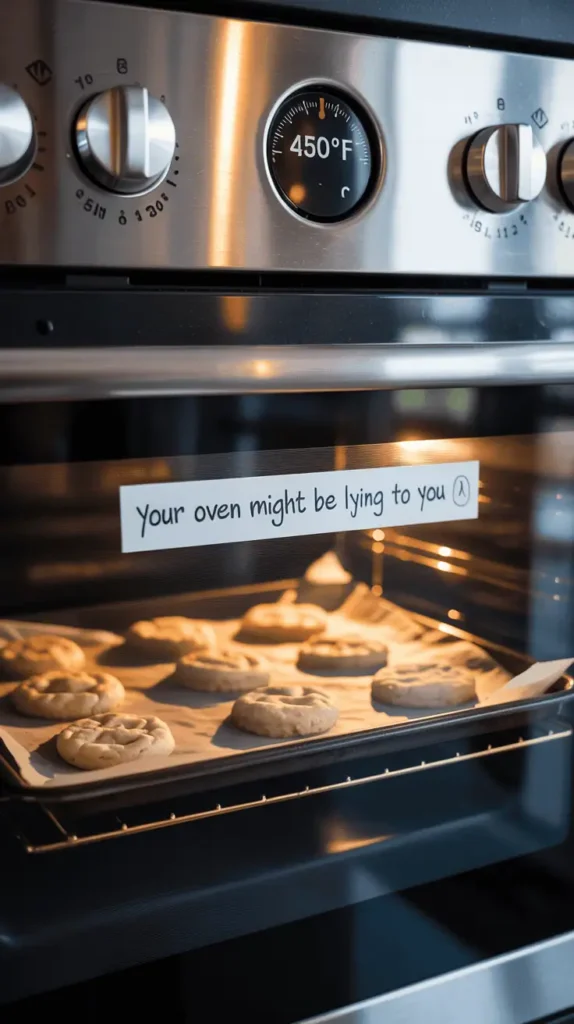
The Fix: Get an oven thermometer! Most home ovens are off by 25-50 degrees from what the dial says. Knowing your actual oven temperature is a game-changer.
For most cookie recipes, 350-375°F is the sweet spot. I personally prefer 350°F because it gives me more control and less chance of burning.
I discovered my oven runs 30 degrees hot after years of cookies that browned too quickly on the bottom. Once I adjusted for this, my cookies started turning out so much better! I hate when people say “just follow the recipe” without acknowledging that every oven has its own personality and quirks.
🔥 Cookie bottoms burning too fast? Your oven might be lying to you. Download my Baking Temperature Cheat Sheet to keep every bake consistent!
6. You’re Using Too Little Flour
Flour provides structure to cookies through gluten development. Too little flour means not enough structure to hold the cookie’s shape during baking.
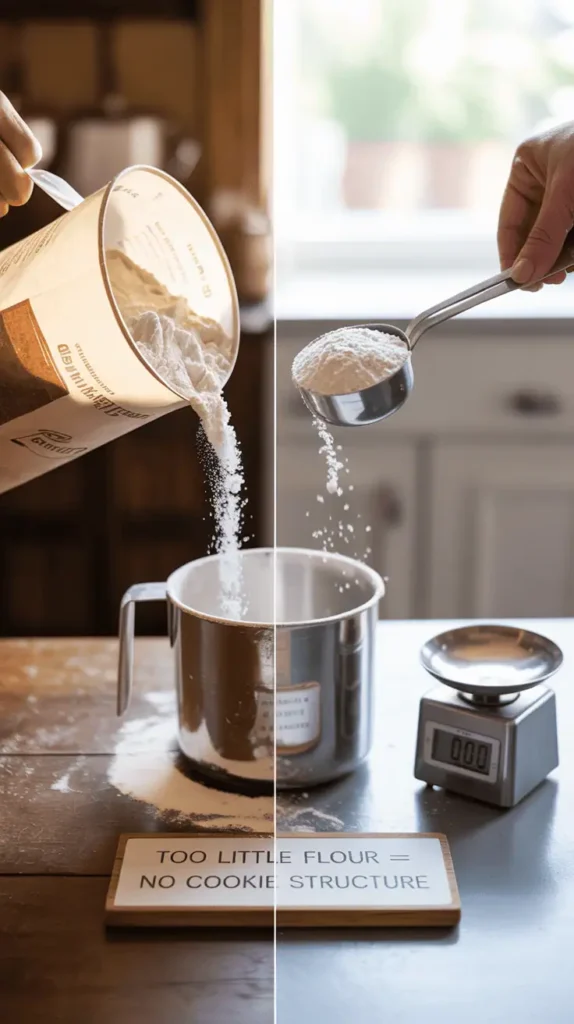
The Fix: Measure your flour correctly! This means either:
- Using a kitchen scale (the most accurate method)
- Or using the spoon-and-level method (spoon flour into the measuring cup, then level off with a knife)
Never scoop directly with your measuring cup, as this compacts the flour and gives you too much.
My grandma taught me to bake by scooping the measuring cup directly into the flour bag, and I couldn’t figure out why my cookies never matched hers until I realized she naturally used a lighter hand than I did. When I switched to weighing my flour, suddenly my cookies were consistent every time!
7. Your Baking on the Wrong Surface
Believe it or not, your choice of baking sheet affects how your cookies spread:
- Dark baking sheets absorb more heat, causing faster spread and browner bottoms
- Insulated baking sheets slow down baking, sometimes preventing proper setting
- Thin baking sheets can warp and heat unevenly, causing uneven spread
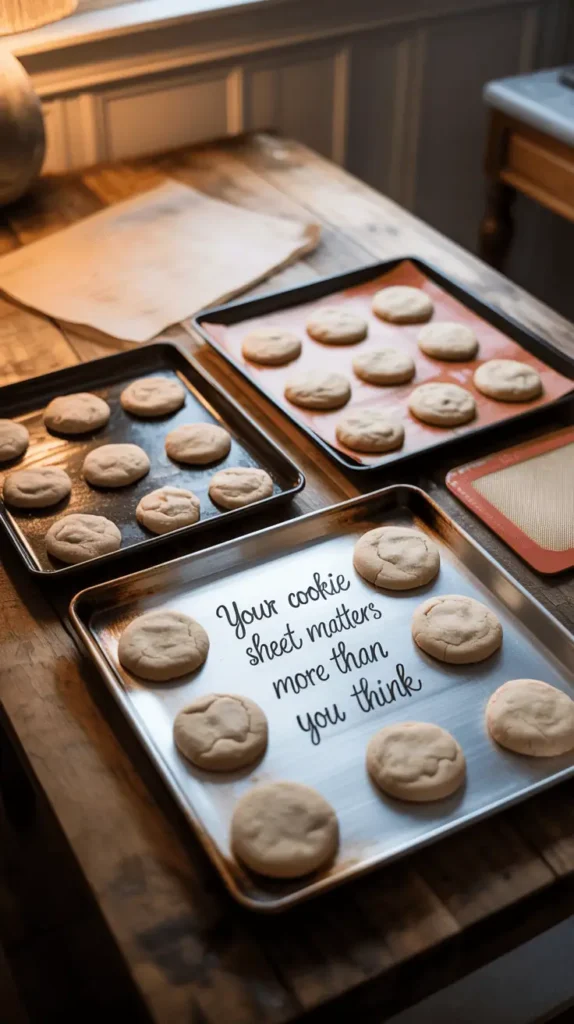
The Fix: Use a medium-weight, light-colored aluminum baking sheet for the most reliable results. And ALWAYS line it with parchment paper or a silicone mat for even baking.
I once tried to make cookies at my boyfriend’s apartment and discovered he only had these super thin dollar-store cookie sheets that warped in the oven with a loud “POP!” as soon as they heated up. The cookies slid to the center and became one massive cookie blob. we still ate it, obviously, but I bought him proper baking sheets for his birthday the next month. Some things are worth investing in!
My Secret Weapons for Thicker Cookies
Over the years, I’ve developed some tricks that help ensure thick, bakery-style cookies every time. These go beyond just avoiding mistakes—they’re proactive strategies for cookie success!
The Cornstarch Trick
Adding 1-2 teaspoons of cornstarch to your cookie dough helps prevent over-spreading and creates a tender, thick center. Cornstarch inhibits some gluten development, which keeps cookies soft and helps them hold there shape.
I discovered this trick from a food blogger years ago and it’s been a game-changer! My chocolate chip cookies with cornstarch stay thick and soft for DAYS (if they last that long, which tbh they usually don’t).
The Extra Egg Yolk Strategy
Adding an extra egg yolk to your dough provides more fat and emulsifiers, which help create a richer, chewier texture and less spread.
I honestly wasn’t convinced this would make a difference until I tried it. The texture difference is subtle but noticeable—cookies with the extra yolk stay softer in the center and have this lovely richness that’s hard to describe but definitely superior.
The Flour Substitution Method
Substituting part of the all-purpose flour with bread flour increases protein content, which means more gluten development and structure.
I usually replace about 1/3 of the all-purpose flour with bread flour in my chocolate chip cookies. This creates a chewier texture and helps the cookies hold there shape better during baking.
One time I accidentally used ALL bread flour and the cookies were almost too chewy—like, jaw workout chewy. But some people actually preferred them! Baking is so personal.
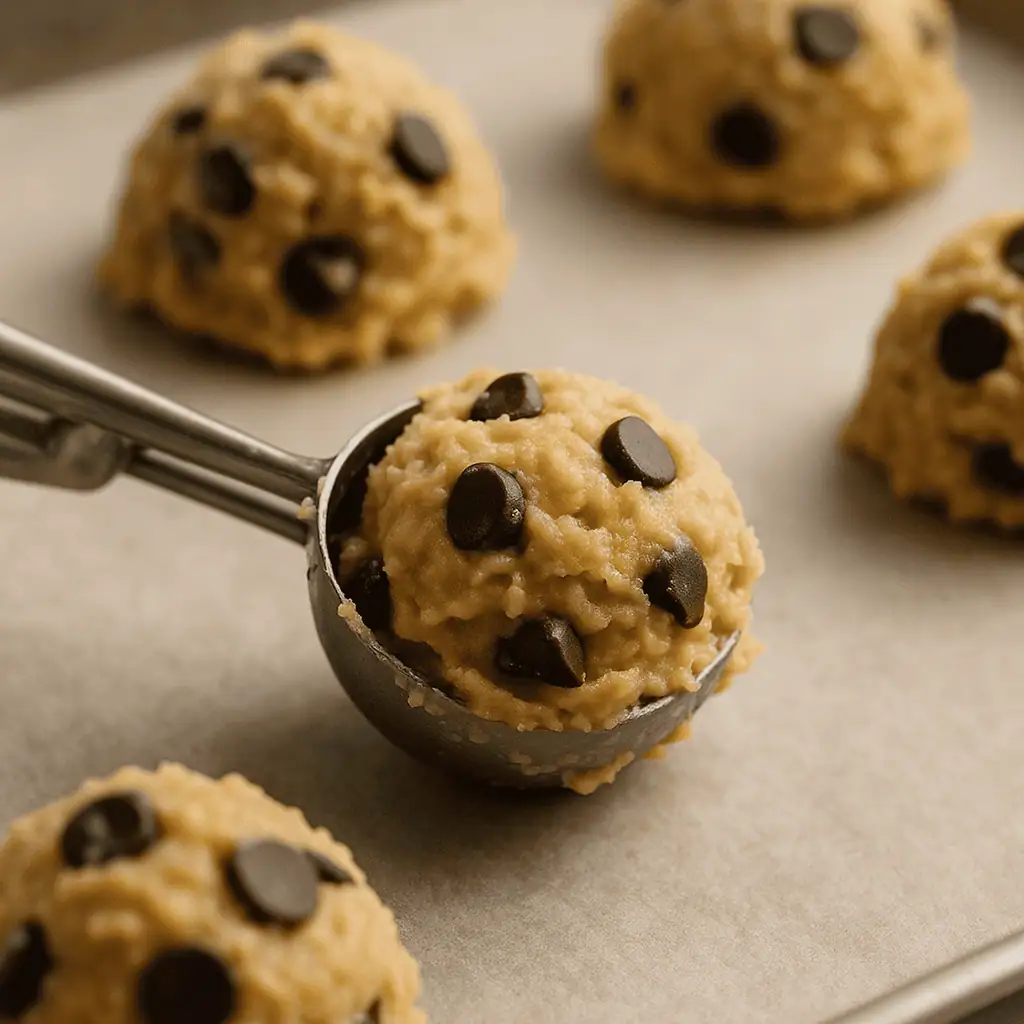
The Scoop and Chill Technique
This is one of my absolute fave techniques for ensuring thick cookies:
- Scoop the dough into balls BEFORE chilling
- Place the dough balls on a plate or small baking sheet
- Chill the pre-scooped dough for 2+ hours
- Bake directly from the fridge
This gives you the benefits of thoroughly chilled dough without having to wrestle with rock-hard cookie dough later. Plus, the outside of the dough ball firms up more than the center, which helps prevent over-spreading.
My Worst Cookie Fail Story (And What I Learned)
I think its important to acknowledge that even experienced bakers have disasters sometimes. My most memorable cookie fail happened during the holidays three years ago, when I was determined to impress my in-laws with my “famous” chocolate chip cookies.
I was baking in their kitchen, which was already stressful bcuz I didn’t know where anything was. I softened the butter in the microwave (mistake #1), used their ancient baking soda without testing it (mistake #2), and baked on thin, dark cookie sheets (mistake #3). To make everything worse, I was rushing because we were late for a family gathering.
The cookies spread into one giant, greasy puddle that was simultaneously burnt on the edges and raw in the center. My mother-in-law very kindly said “they’ll still taste good!” but I was MORTIFIED. We ended up stopping for bakery cookies on the way to the gathering, and I learned a valuable lesson about not trying to bake in an unfamiliar kitchen while rushed.
The silver lining? It makes for a great story now, and I always bring pre-made cookie dough when visiting family these days!
Want a quick reference for fixing baking mistakes? Print out the Baking Fail Fixer Guide — perfect to keep on your fridge!
A Foolproof Recipe For Thick, Perfect Cookies
After all my failures and experiments, I’ve developed what I consider a foolproof chocolate chip cookie recipe that resists spreading. Here it is:
Thick & Chewy Chocolate Chip Cookies
Ingredients:
- 1 cup (2 sticks) unsalted butter, cool room temperature
- 1 cup packed brown sugar
- 1/2 cup granulated sugar
- 2 large eggs + 1 egg yolk
- 2 tsp vanilla extract
- 2 3/4 cups all-purpose flour
- 2 tsp cornstarch
- 1 tsp baking soda
- 1/2 tsp salt
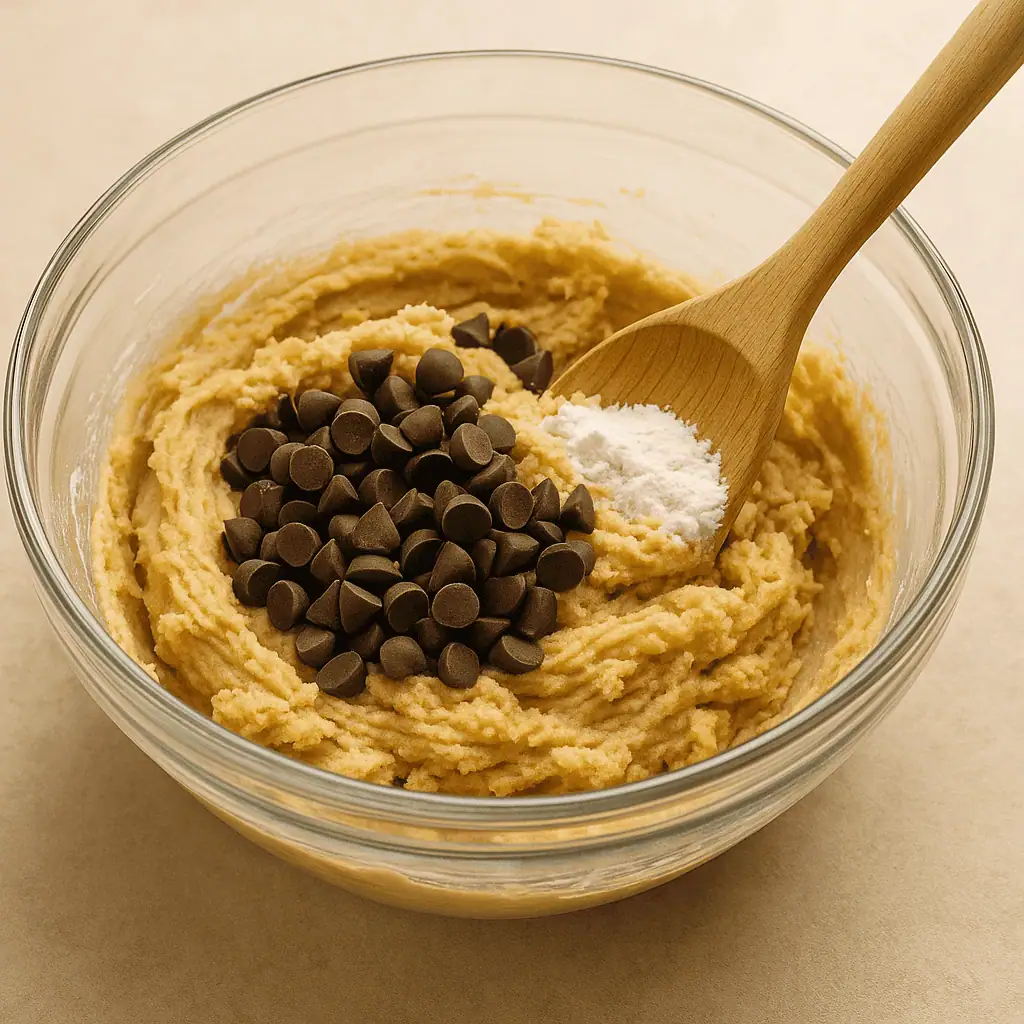
- 2 cups chocolate chips or chunks
Directions:
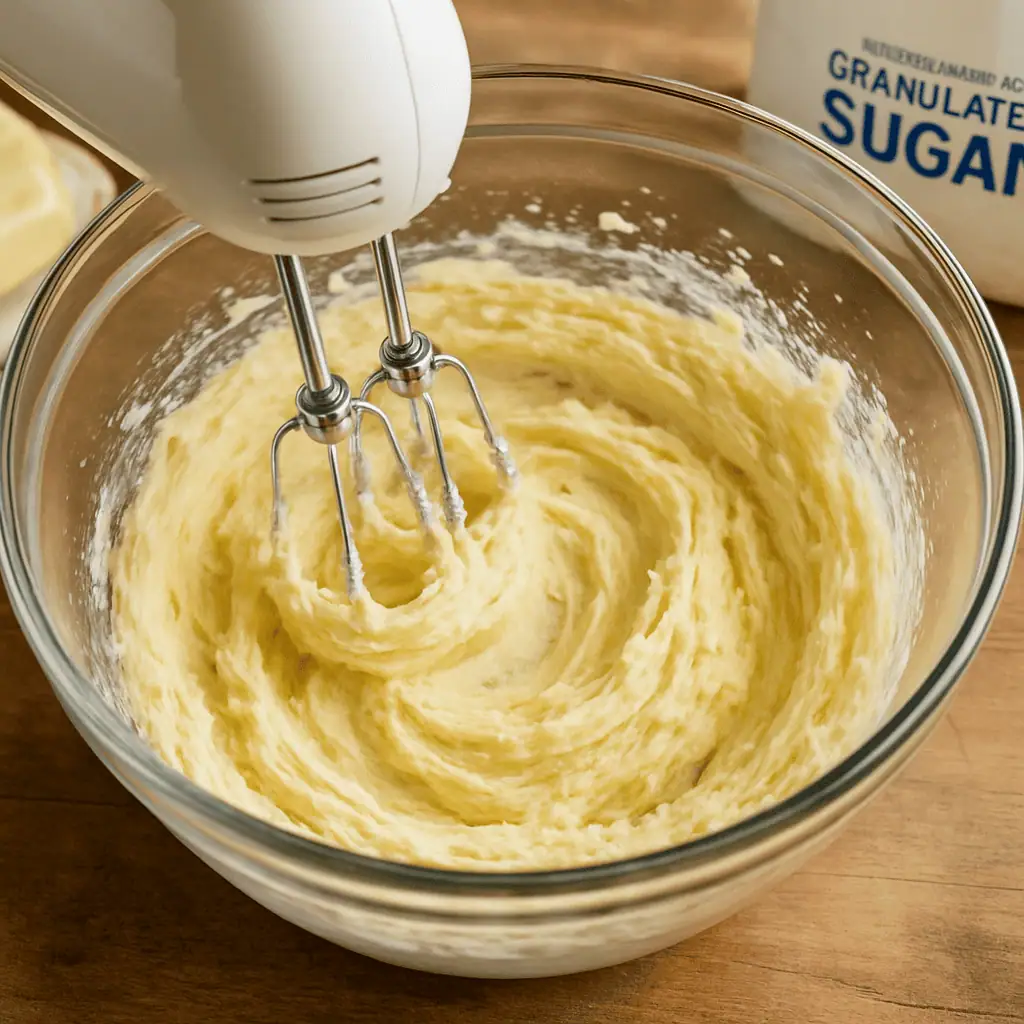
1. Cream butter and both sugars until just combined, about 1 minute (don’t overbeat!)
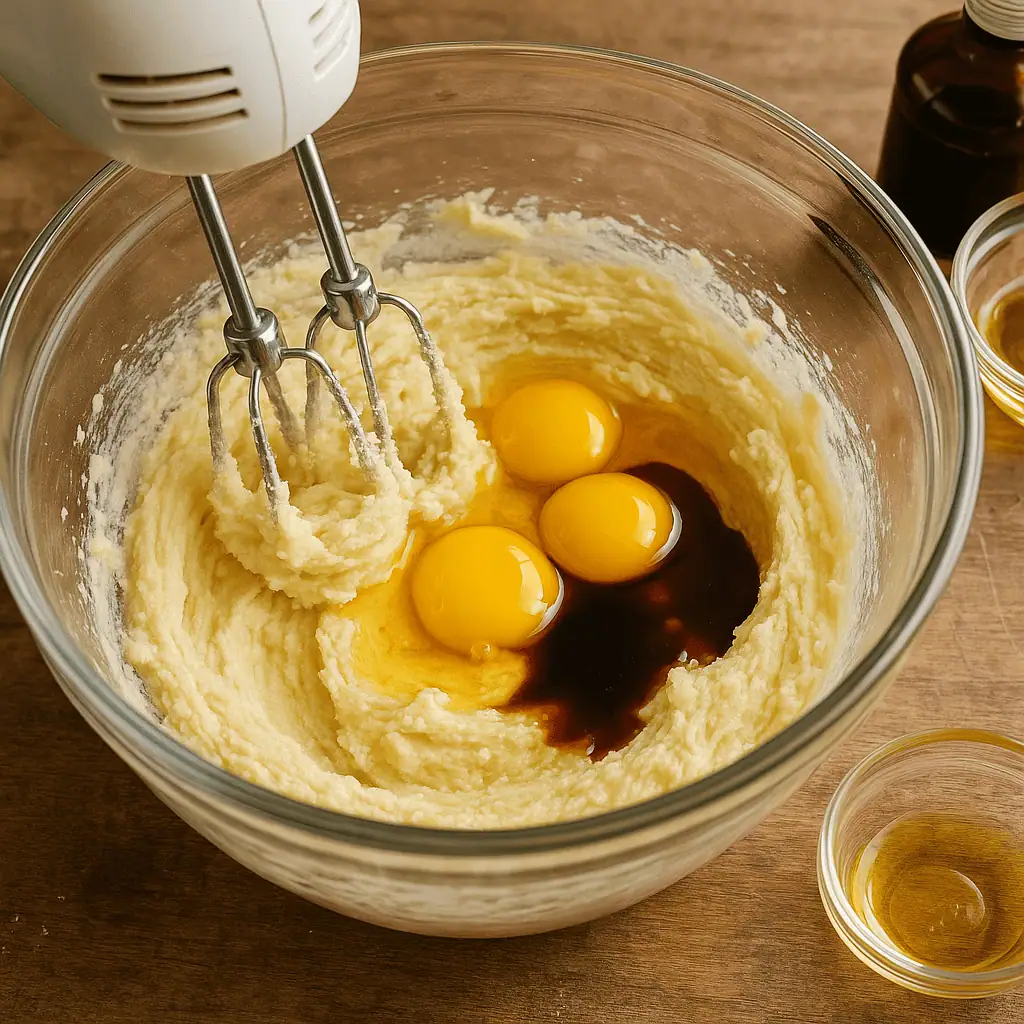
2. Add eggs, extra yolk, and vanilla. Mix until incorporated.
3. In a separate bowl, whisk flour, cornstarch, baking soda, and salt.
4. Add dry ingredients to wet ingredients and mix until just combined.

5. Fold in chocolate chips.
6. Scoop into large balls (about 3 tablespoons each)
7. CHILL for at least 2 hours, preferably overnight
8. Bake at 350°F for 11-13 minutes, until edges are set but centers look slightly underdone.
9. Cool on baking sheet for 5 minutes before transferring to a wire rack.
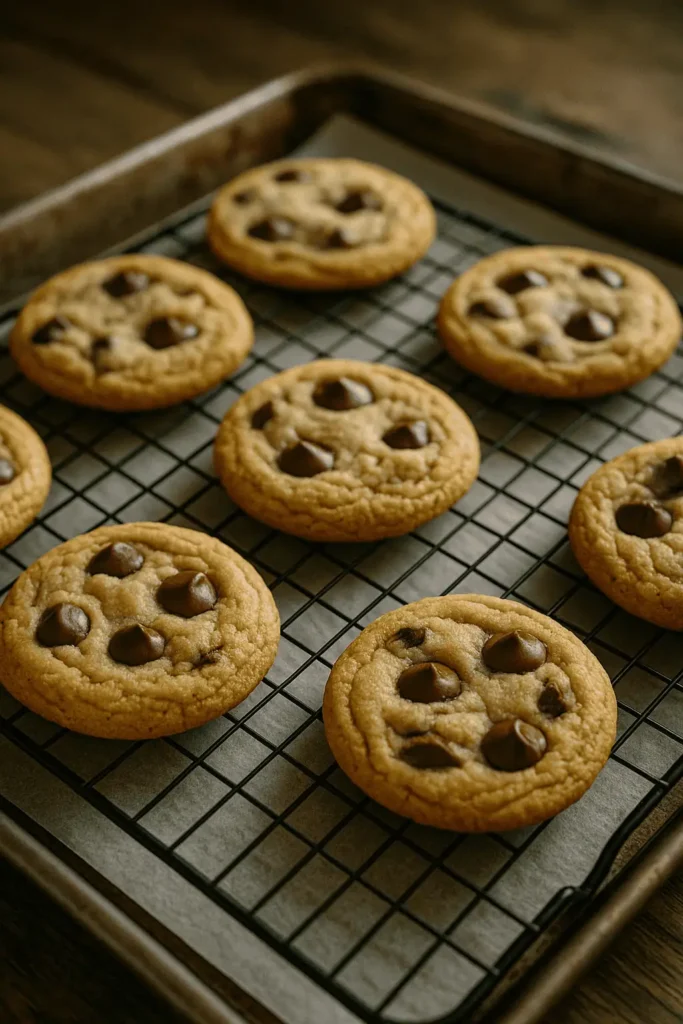
This recipe incorporates all the anti-spread tricks: proper butter temperature, more brown sugar than white, cornstarch, an extra egg yolk, and mandatory chilling. its basically bulletproof against flatness!
When Flat Cookies Are Actually What You Want
Ok, here’s a hot take—sometimes flat cookies are BETTER. gasp
Thin and crispy cookies have their place in the cookie hierarchy! If you’re a fan of thin, crispy cookies (like Tate’s-style), then you actually WANT spread.
To intentionally make flatter cookies:
- Use melted butter instead of softened
- Use more white sugar than brown sugar
- Slightly reduce your flour
- Don’t chill the dough
- Use baking powder instead of baking soda
- Bake at a slightly lower temperature for longer
My dad always preferred thin, crispy cookies, so I’d make a separate batch just for him with these modifications. I actually love having both styles of cookies on a dessert platter—gives people options!
Conclusion: Cookie Confidence Comes With Practice
If there’s one thing I’ve learned from my many, many cookie failures, it’s that understanding the WHY behind baking makes you a better baker. Once you know what causes cookies to spread, you can troubleshoot and adjust your recipes for exactly the cookie style you prefer.
Don’t get discouraged by flat cookies—they happen to everyone! Each batch, even the fails, teaches you something about baking science. And hey, even flat cookies usually taste pretty darn good. I’ve never met a cookie failure that couldn’t be rescued by crumbling it over ice cream!
Remember that things like humidity, altitude, and ingredients brands can all affect your results too. Baking is both a science and an art, which means there’s always room for experimentation and improvement.
The most important thing is to keep baking, keep learning, and keep eating delicious cookies (flat or not)!
Btw, I almost forgot to mention my absolute FAVORITE trick for emergency cookie cravings! When you make your next perfect batch of cookie dough, roll all of it into balls and freeze them on a baking sheet. Once frozen solid, transfer to a ziplock bag. This way, you can bake just a couple of cookies whenever the craving strikes! No need to thaw—just add 1-2 minutes to the baking time. I’ve found frozen dough actually bakes up THICKER than just refrigerated dough bcuz the center stays colder longer while baking.
Also—if your cookies are already spreading and ur mid-bake, you can press chocolate chips into the tops while there still warm to make them look thicker and more bakery-style.
And one last thing: if you make a really good batch, take a pic of them next to the recipe with notes about EXACTLY what you did (oven temp, baking time, etc.). I can’t tell you how many times I’ve made “perfect” cookies and then couldn’t replicate them bcuz I didn’t remember all the details! 🍪
🎁 Want All My Free Baking Printables?
Whether you’re a beginner or a baking pro, these resources will help you avoid common mistakes, get perfect results, and finally understand your oven. Download them all in one click:
- ✅ Baking Conversion Cheat Sheet
- ✅ Baking Temperature Cheat Sheet
- ✅ Baking Fail Fixer
- ✅ Oven Personality Tracker


